Most of the time, people are not aware of how wheel spacers work even if they are needed for wheels that do not always fit all types of roads. There are times when people have to use a wider set of tires. Wheel spacers make vehicles perform better because they widen the car’s wheelbase. It gives vehicles a better appearance because it changes the vehicle clearances and the way it runs. So, if you have been asking the question:” how do wheel spacers work?” Then read further and get your answer.
Function and Purpose of Wheel Spacers
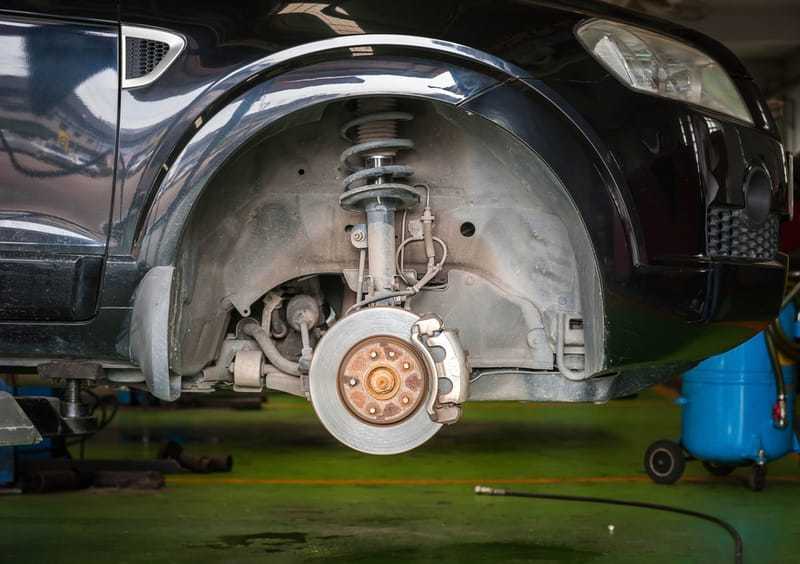
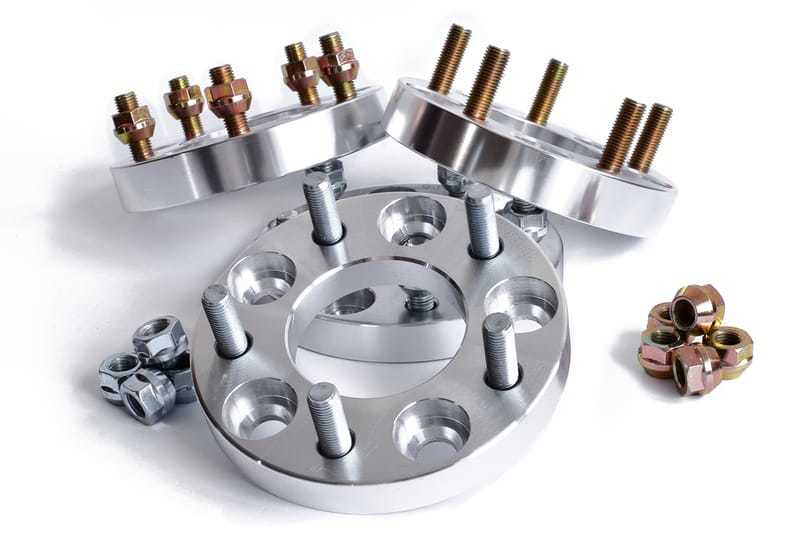
The design of wheel spacers is to make a space between the wheel and car when the tires are larger. There are bolts found in wheel spacers that match the tire hub with the holes and has studs which secure the spacers. The bolts that come through the spacers are also known as studs. These studs are for holding the wheels onto the car or vehicle.

After that, the studs get mounted to the brake drum/disc. When this happens, the wheels and spacers are compactly fitted together, like they were a single unit. When the wheel is fitted onto those studs, put a lug nut on each stud, and use a wrench to tighten them. This kind of arrangement gives better leveling on all of the tires, without risking the spacers or tires to fly off. If you are into off-road driving, wheel spacers should be installed for a safer and smother experience.
Wheel Spacer Issues
Even if wheel spacers are for increasing vehicle performance, it can sometimes produce problems:
- Wheel spacers have the tendency to put a heavy load on the sheer that wheel studs have
- There are times when wheel spacers add load to wheel bearings
- It puts more pressure on the suspension components
- Wheel spacers can sometimes change airflow brakes
Types of Wheel Spacers

All of the wheel spacers put stress on the hub and axle of the vehicle. Urethane and aluminum in the wheel spacers add more balance that is needed for off-road vehicles and also recreational driving. When it comes to off-road vehicles, these wheel spacers are attached so that studs on ATVs or 4-wheel motorcycles are pressed. Although, some wheel spacers require that the press-in studs should be removed from the hub before placing them on the wheel. When this happens, there are extra-long bolts that get driven through the whole arrangement.
How to Install Wheel Spacers
- Before anything, make sure that the wheel spacers you are installing are designed for your type of vehicle. You should never use wheel spacers that are not a proper fit for your vehicle.
- Loosen the lug nuts but be careful not to remove them. These lug nuts are used for fastening the wheel and the hub together, as well as the breaker bar before raising your vehicle.
- Use the automotive jack to put under the vehicle so that it can be lifted until 1 tire is totally raised from the ground. Then, take a jack stand and slide it under the vehicle, and lower it onto the jack stand. You should always work on your vehicle with a jack stand under it because an automotive jack is not enough and the vehicle fall, which could cause injury or even death.
- You should now finish removing every lug nut. Then, slide the wheels until they are removed from the hub. Put them aside 1st. Spray the lug nuts with degreaser and use a rag to wipe them down. In case they get really filthy, take a wire brush to clean the threads. Wipe the hubs where you are going to install the wheel.
- Easily slide a wheel spacer on the studs, as long as it is not bolt-type studs. Line those holes found in the spacer until the studs before sliding the spacer over the studs. Make sure that it is firmly seated on the hub. There are vehicles that use lug bolts which thread into the hub. When this happens, align the spacer and the holes that you see in the hub.
- Put the wheel spacer on the studs, as long as it is a bolt-on type of spacer. Start installing the lug nuts on the studs to bolt the spacer. The bolts already come with wheel spacers but you can also get them from auto shops in case you have to. Make the nuts tighter which hold spacers in place according to what the directions specify. This is going to be most likely around 90 ft. pounds.
- You should slide those wheels on the lug studs to make it sit firmly opposite the spacer. Take a wrench and use it to put the lug nuts. Do this step again on all corners.
- Take the floor jack and slide it under the vehicle to life the vehicle allowing you to remove the jack stand. Lower the car by corner to the ground.
- Make the lug nuts tighter using s torque wrench which is in a crisscross pattern. Tighten them anywhere from 70 to 90 ft. pounds, which depends on which vehicle you have. Check if the lug nuts are tight enough after you have driven the vehicle 100 miles.
- Ideally, the manufacturer specifies that you tighten the lug nuts minus 10% based on their specification using a torque that has been properly calibrated. Although, it is not always a good idea to tighten it according to the specification of the manufacturer because it can sometimes break the studs. Although, check the tightness regularly, especially after you have installed them.
Now you can stop asking “how do wheel spacers work?” because you were given information about it and even the easy to install them. Keep in mind that you should follow everything accordingly because it can cause injury if you make a mistake.
